|
|
Post by Steve Austin on Feb 25, 2007 21:16:59 GMT -8
Hi John, It looks like you've got all the basic formers together, have you indexed the armature to the base plinth? The images look fine from my end and I'll be looking forward to your progress. Steve  |
|
geep
New Member

Posts: 26 
|
Post by geep on Feb 25, 2007 23:40:19 GMT -8
Hi Steve, The base is indexed to the armature by the three dowel pins sticking up through the base template. I managed to get most of the top surface roughed in this evening. Here are a few photos of the progress today: 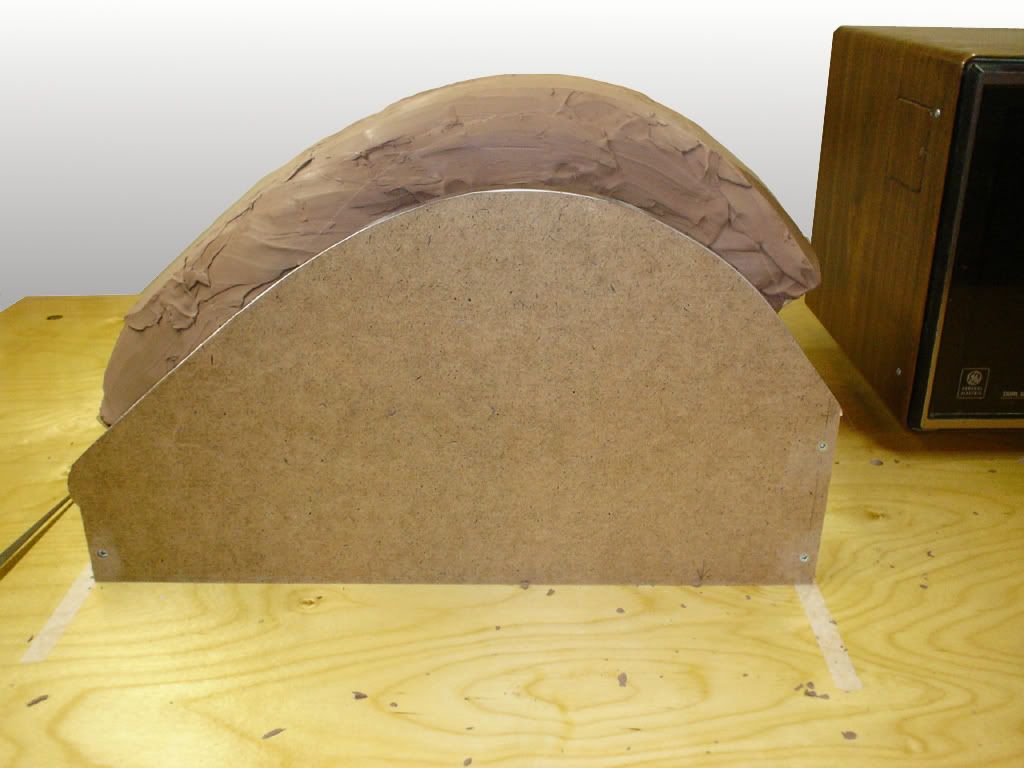 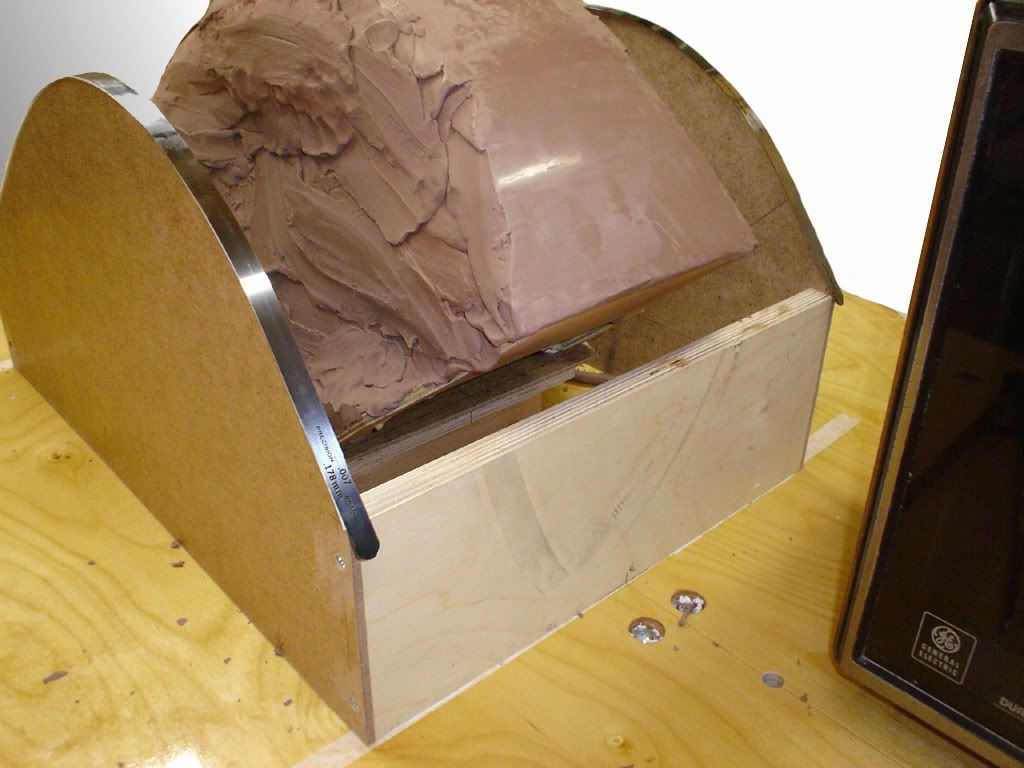 I started out by applying a skim coat of hot clay with a spatula. I made this coat about 1/8" thick. My main goal was to force the almost liquid clay into small holes I punched in the foam to key the two together. After the initial coat I reduced the oven to around 135F, put in some fresh clay, and began building out the shape. As I went I tried to bed in the Lucite sweep by taking small cuts in the warm clay with a sawing motion. I ended up sticking .007" feeler stock to the 1/4" masonite template to provide a smoother surface for the sweep to run on. I also found the 1/8" Lucite sweep to be too flexible for the job. Even when used over warm clay it would bend enough to make holding the contour difficult. I also practiced using the finisher and flat steel on the back surface removing chatter marks left by the sweep. The surface ended up glossy, but not flat! Tomorrow I plan to make an aluminum sweep of the same dimensions as the plastic one and try it out. I think a stiffer sweep will make it much easier to create a smooth surface. I also need to sit down with a lump of clay and practice hand surface development. In particular, my finishing technique needs lots of work. Anyway, that's todays work. I have much to learn! ;D John |
|
|
|
Post by Steve Austin on Feb 26, 2007 13:10:04 GMT -8
Hi John, You may find backing up the curve with plywood will keep the flex to a minimum. You also want to apply the clay in layers and sweep the curve through before it cools. The chatter marks are a combination of trying to remove too much at once and the clay being too cold to cut. Ideally the sweep needs to be pushed through with the clay as hot as possible. Make sure the clay doesn't over heat otherwise the ingredients will start to separate i.e. the sulfur will oxidize leaving hard yellow particles in your finished surface. Apart from those few tips everything is looking good. Steve |
|
geep
New Member
Posts: 26
|
Post by geep on Mar 1, 2007 8:45:38 GMT -8
Update time. Over the past few days I've managed to spend a few more hours working on the model. I made a true speep from 1/8" aluminum, revised a masonite template, and started work down the left side of the model. Things I've learned: I've had problems with the clay laminating as I pack it on because the base wasn't warm enough. I found a quick way to test if the surface is ready. Take a ball of warm clay and tap it on the surface. If it sticks, the surface is ready. If it doesn't stick, the surface is too cold. There's a temperature range at which the clay accepts templates best. Too warm and the clay "tears", ruining the surface. Too cold and the templates are reduced to shaving. (The tearing may be partly due to one of my templates not being sharp enough.) Masonite templates work much better than I expected, even in the unsanded condition. Here are some new photos: The new sweep, made from stock in the scrap bin: 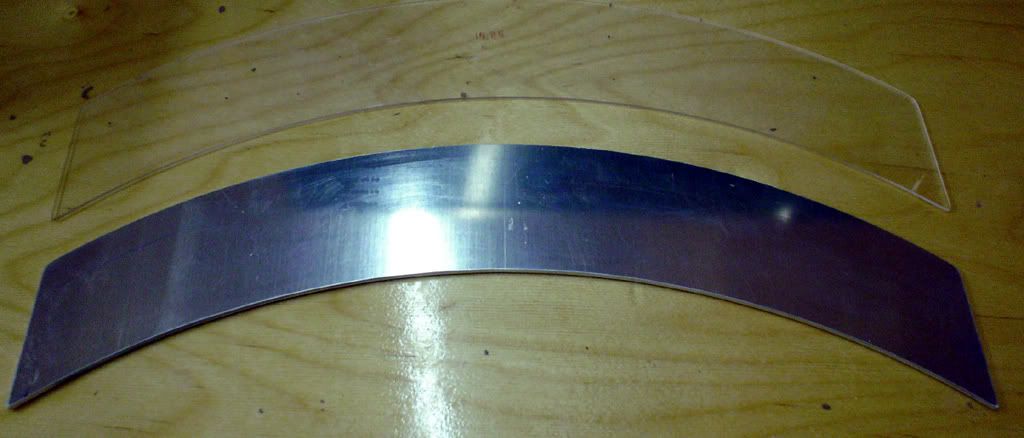 An adjustable layout square modified to point in layout lines. 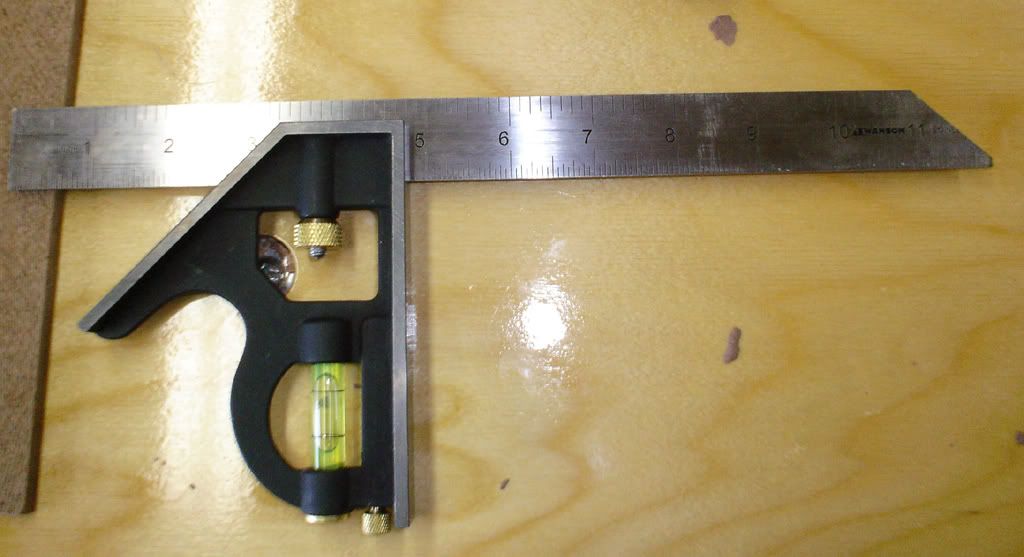 Transferring the knee cutout shape to the model. The template is placed parallel to the centerline of the table and indexed to a mark on the back of the armature. After marking the cutout line, I slit the clay with an X-acto knife and pushed in a piece of fishing line. 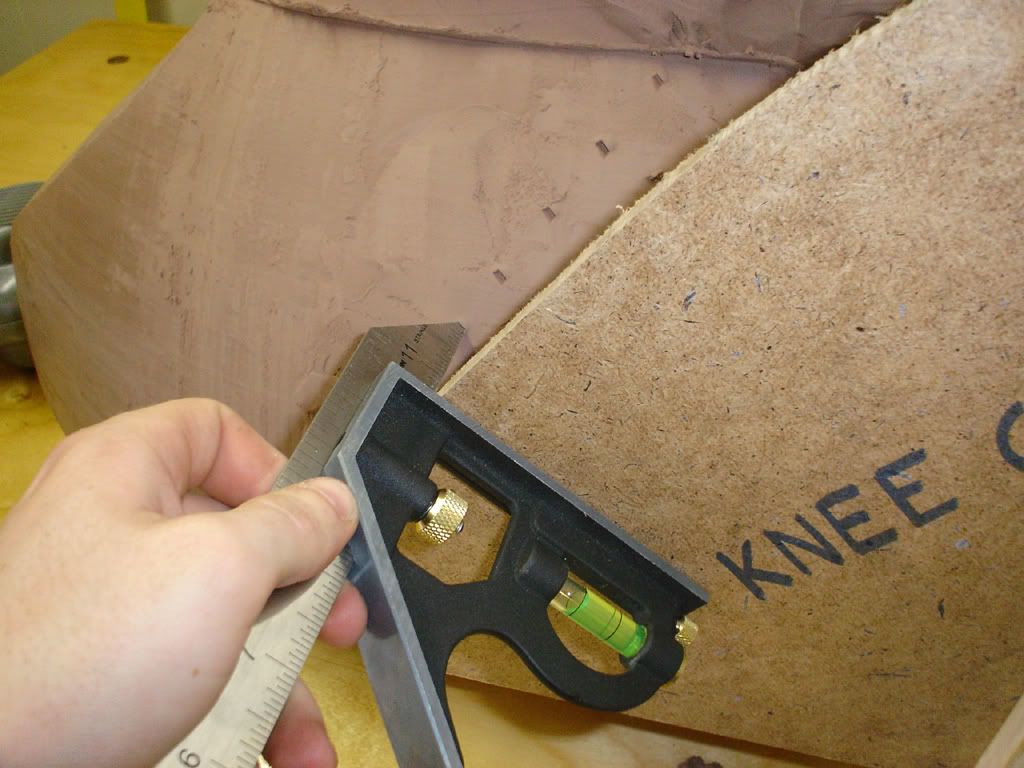 After shaping most of the left knee cutout with the template. I came back after the template with a curved rake and cleaned up a bit. I need to make a curved steel so I can remove the chatter marks, my curved rake isn't small enough. 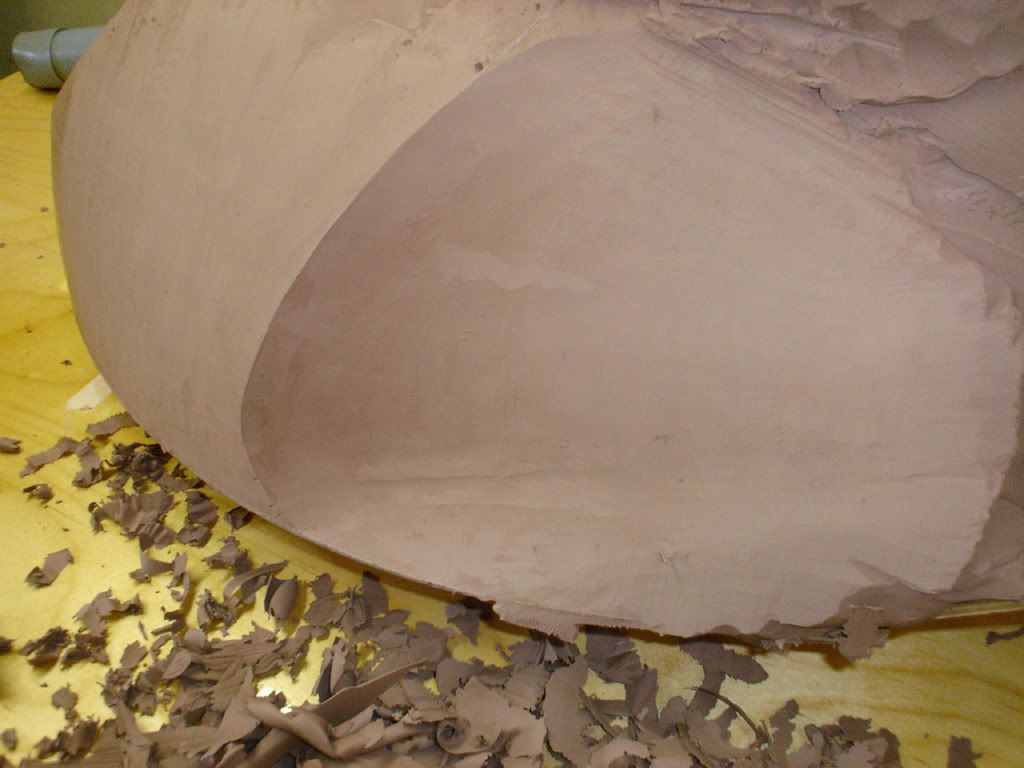 A wider view: 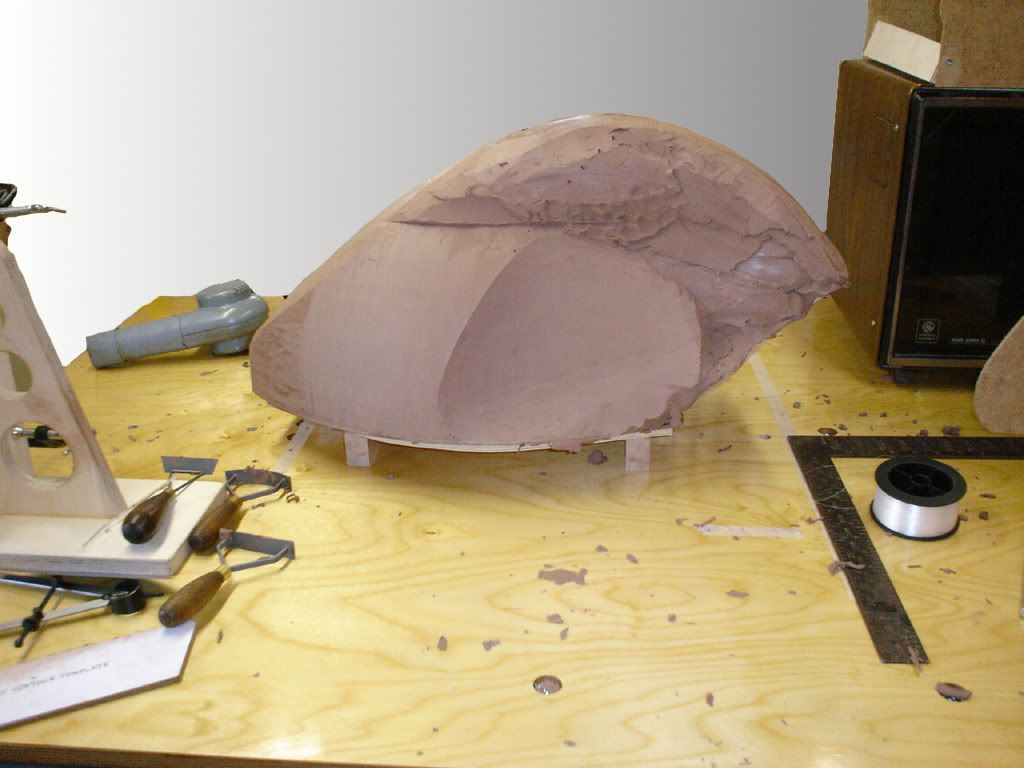 Next, I need to build a jig to hold the seat relative to the tank as it would be on the motorcycle. The front curvature of the seat is key to the shape of the knee cutout at top at the back of the tank. Then I can finish the knee cutout. I need to fair in the area between the front radius and the top of the tank above the knee cutout. I expected this due to the small curvature of the template. I'll do this by hand and use my profile gauges to transfer the shape to the right side. That's all for today. |
|
|
|
Post by Steve Austin on Mar 1, 2007 21:56:36 GMT -8
Hi John, Just to let you know that this thread has migrated over to the new forum, www.forum.claysculptors.com I've resized the images to suit the new board and I think it's looking good. Looking forward to the next update on the new board. Let's hope everyone joins in. I've already replied to your latest update so go on over and check it out. Steve |
|
geep
New Member
Posts: 26
|
Post by geep on Mar 1, 2007 23:08:31 GMT -8
OK Steve, sounds good. This thread will continue on the new board!  John |
|


